How to bulk download photos from Google Photos

Google Photos is an excellent service for archiving and storing the photos we take every day with our smartphones and tablets. It is also ideal for viewing photos directly online from any device. But there is a problem: there is no “official” guide to quickly and easily download all photos and videos, or multiple photos at once, from Google Photos to your computer (Windows or Mac). You can do this for a single file by selecting it and once opened by clicking on the three dots in the top right and selecting “Download”.
However, there are alternative solutions to download ALL photos from Google Photos to PC or Mac, and we want to share them in this article. Read on to find out how to save photos to your computer and manage them as you wish, even in OFFLINE mode.
Download All Photos from Google Photos on PC and Mac
METHOD 1: Using Google Photos Bulk Downloader Extension
Google Photo Bulk Downloader is a Chrome extension that lets you automatically download photos and videos from Google Photos quickly and easily. Forget about manually downloading them one by one — this extension does it all for you!
🎯 How it works?
First install the extension from the chrome web store: https://chromewebstore.google.com/detail/google-photos-bulk-downlo/lefkihojjfilonafalapdkkobabcogge

1️⃣ Open Google Photos in your Chrome browser.
2️⃣ Click Start Download in the extension.
3️⃣ The extension will automatically download your photos and videos
Click here to see a detail video tutorial (on YouTube)
🌟Key Features
✅ Automatic photo and video download — The extension opens each file, simulates the Shift + D shortcut, and saves it to your computer. 💾
✅ Smart navigation — After downloading, it automatically presses the right arrow to move to the next file. 🔄
✅ Fully automated operation — Once started, the process continues without manual intervention. 🏆
✅ Set a download limit — Choose how many files to download in one session. 🎯
✅ Fast and efficient — Optimized for fast and seamless downloads. ⚡
✅ Intuitive interface — Start the process with just one click!
🚀 Why use Google Photo Bulk Downloader?
🔹 Save time — Download in bulk without any effort.
🔹 Simple and automatic process — No manual intervention required.
🔹 Ideal for backup — Easily save your photos and videos to your computer.
Download Google Photo Bulk Downloader now and start saving your memories with just one click! 🔥🎞️
METHOD 2: Using the Google Takeout service
Access the Google Takeout service from the following link: https://takeout.google.com/settings/takeout
If you are not logged in, log in using your Google account data, the same one used for the Google Photos app.
A window will open with all the Google services. From these, select only the one related to Google Photos
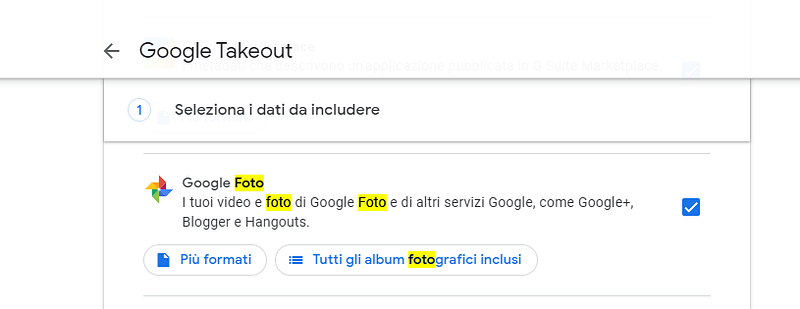
Then click on “Next” at the bottom to proceed to the second step where you will have to select the “Export an archive” option and choose the format (e.g. .zip) at the bottom.

Finally click on Create Export and you can choose to receive a link from which you can download all the photos. The photos will be downloaded to your PC/Mac in a .zip archive.
This is the easiest and fastest method to download all the photos from Google Photos to your computer. Once saved on your PC/Mac you can view the photos freely or transfer them to other devices.
METHOD3: Using Google Backup and Sync app
Here are the detailed steps you need to follow on your computer (Windows or macOS) to download photos from Google Photos.
Step 1. Go to https://photos.google.com/apps. From this page, click on the “Download” button to download the Google Backup and Sync app, a free tool that will allow us to download photos from Google Photos to our computer

Step 2. Install Google Backup and Sync
Download Backup and Sync and then double-click the downloaded file (installbackupandsync.exe) to install it.

Follow the instructions that appear until you see an “Installation Complete” message:
After installation, if you have a Windows PC, the Backu & Sync icon (cloud with upward arrow) will appear at the bottom right of your desktop. Clicking on it will open the window of the program you just downloaded. If you have a Mac, the icon will be visible in the menu bar at the top of the screen.

Step 3. Open Backup & Sync and download photos and videos to Google Drive
Now right-click on the Backup and Sync icon (cloud symbol) and in the window that opens click on START. At this point you will be asked to enter your Google credentials
Enter your email and password to log in.
Once logged in, select the “Photo and video backup” checkbox and click Next at the bottom right

The following window will open where you will have to select the folder where you want to save your Google photos. Click the box next to the desired folder to select it.
If you do not see the folder you want to use, click CHOOSE FOLDER to choose one. You can select any folder on your computer.

After setting the output folder you will be able to choose between:
High quality to get photos with good quality and small file size. This should work well for most users, although if you are a professional photographer working with huge RAW files, you will only notice a minimal degradation in quality. This option also allows you to store unlimited photos and videos without paying for extra storage.
Original quality to get photos (and videos) with the original resolution and size. This option is ideal for people who need very high resolution photos, but it may require extra (paid) space on Google Drive.
Finally click START to begin the process of backing up all your photos and videos from Google Photos. This may take a while, depending on the number of photos and videos you need to download. It is fine to do other things in the meantime, such as downloading your photos.